Friday 31 August 2012

Replying to comments


It took me absolutely ages to realise that it was largely pointless replying to comments on your own blog.  Most people don't sign up to be notified of replies, so they won't see your reply unless they happen to come back to that post for some reason.

So finally I figured out that the best thing was to visit the blog of the person leaving the comment and leave a comment on their blog - sometimes replying to what they said or often just making a comment on one of their posts.

The only replies I do on my blog is where the person doesn't have a blog or I can't figure out which blog they come from.  I do warn people commenting that this is what I do like this:


Are you having trouble uploading photos into your posts? You are not alone

Is this all you are seeing when you try to upload?

Hi everyone - just a quickie to say that it appears a lot of people are currently finding themselves unable to upload photos into their posts.  Blogger just seems to be going into a loop.

There is a way around this while, hopefully, Blogger is sorting this out.


You go into HMTL instead of compose and then put your cursor at the top of your post and click the photo icon - you will get a different screen but you can still choose your photo and upload it.  To see how it turned out, go back to Compose and you will see it there.


Thursday 30 August 2012

Follow back etiquette


This post is just a reminder that if someone signs up to follow your site, you should follow them back.  No exceptions.

But if you find you don't like their site after a week or two, then simply unfollow them.

Sometimes it is a bit tricky to work out which blog your new follower is from.  The Google names they follow on are often not blog names.  The first thing to do is to open your dashboard and click on followers.  Then click on the new follower's picture - this will take you to their Blogger profile.  Often under Links, their blog will be listed.  If you have tried to figure out which blog it is and failed, obviously you have done your best.

If you are going to follow a blog and want them to follow back, I suggest you put in a comment saying you are now a follower and include your blog's name.  This makes it easier for them to follow back.  And there is absolutely nothing wrong with asking for a follow back.

I guess you all know how to unfollow blogs using the Blogger Old Interface.  I have actually found that an easier way is to go to the blog, sign in as a member using your Google password and then Google will put your icon up at the top and you can click Options and then Site Settings and then Stop Following This Site - it will then ask you to confirm again that you really mean it.  Click and you are no longer following that blog.

Wednesday 29 August 2012

How to crop a screenshot and put it into your blog


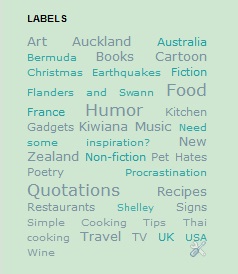
The snippet above is part of a screen shot of my main blog, Carole's Chatter.  I have only learned how to do this in the last few days so I wanted to share it with you.  The screen shot can be of anything you like.

First, you probably all know how to do a screenshot - I didn't - probably one of the last few in the Western World!  But just in case, for most pc's you will find a button labelled "Print Screen" just above the "Insert" key in the block of buttons to the right of the main keyboard.  On my laptop it is the row of buttons at the top just to the right of F12 and is labelled "prt sc".  On some laptops you might need to push the function or shift button at the same time to get to it.

Now, it doesn't actually print the screen - it saves it to your clipboard.  Then you need to crop it to just show the bit you want to copy in to your blog.  There are probably heaps of different ways you can do this but I did this (sorry Mac users I don't know if you can do it like this):


Open Paint.  You will find this by clicking the Windows icon right at the bottom right of your screen.  Then click All Programs, then scroll down to Accessories and you will find Paint listed there.  I actually dragged it onto my bottom toolbar so I can get to it quickly each time I want to use it.

Then click Paste - at the top left and bingo, your screenshot will appear.  Then you have to select the area you want to copy.  I found the best way to do this was to click select (just a bit to the right from paste) and then click free form selection and then go back and click rectangular selection - for some reason this makes selecting easier.  You then click at the top right of the part you want to copy and drag it diagonally until you have it all in the box.  Then click Crop (which is one to the right of Select).

Then all you do is go to the Blue tab above paste and click on the little arrow beside it and it will give you an option to Save As - save it in whatever folder you want (I now have one called Blog Tips).

Then you just insert it into your post the way you would any image.


Monday 27 August 2012

The Blogs I Follow Gadget


Fairly soon after I started blogging I realised that my home page was getting very long because of the list of Blogs I Follow - which is one of the standard Blogger gadgets.  It is nice, of course, to give recognition to the blogs you follow but when there gets to be a long list I think it loses its effectiveness and just becomes a source of clutter.

What I did was instead of having a full list, I created several different short sidebars.  One lists the 5 Food Blogs that I am featuring that month.  The others list featured 4 Book Blogs and 6 Personal Blogs - those I refresh only every 2 months.

All you then have to do is remember to choose the blogs to add/remove each time you review your lists.

For the newbies, this is how you created a Featured Blogs List:

  1. Delete your Blogs I Follow gadget (if you have one0 - you can always put it back later if you want to.  To delete this you need to be on the Layout section of your dashboard.
  2. Click add a gadget.  Don't worry where it is at this stage because once you have created it you can always drag it to where you want it and drop it there.
  3. Then select Blog List - give it a suitable title, choose whether to sort it by last updated or alpha (I chose alpha because that's the sort of train spotter I am).  Leave it at showing all blogs - since you will only be adding a few.  And lastly choose how to display the blogs I chose Icon and title of most recent item only.  You could choose a bigger display but I like to keep things as simple and uncluttered as possible.
  4. Then you have to add the blogs you want in the list - you can either add by copying and pasting their url's in or you can click from your blog list and choose from there.
  5. Finally, don't forget to click the orange save button right at the bottom of the gadget window otherwise all of your hard work will have been for nothing!
You can do sidebars for lists of your own posts a similar way but you use the Link List gadget instead of the Blog List one.

Happy blogging.


Sunday 26 August 2012

Getting the best from Google Searches


OK - I am no expert on techho things.  But I thought you might be interested in a few easy tips for improving your Google search results.  I poked around on the net to find an article for you but the ones I found were very geeky.  So here goes, in my own words.


  • If you want Google to only find sites with a particular word in them put followed immediately by the word eg +search


  • If you want Google to find you sites with a particular phrase, put that phrase between quote marks eg "searching Google"


  • If you are getting too many results that are irrelevant you could try adding a word or words for Google to exclude.  You do this by putting a minus sign directly before the word eg if you wanted results about Searching Google that didn't include SEO information you would put "Searching Google" -SEO


  • My last tip, is about using what is called a tilde (who knew).  I found it on the keyboard on the left hand side just above Tab.  It looks like this ~ .  This is a really useful one - if you put it before a word you are searching Google won't just search that particular word but all other words that it believes means the same.  So if you were searching for "can opener" for instance if you put ~can opener, Google would also look for tin opener.

Happy searching.  And apologies to all of you for whom this is old hat.


Saturday 25 August 2012

Managing your label cloud or list in Blogger

Carole's Chatter label cloud
When you are posting it is important to assign as many relevant labels to your posts as you can for SEO reasons.  But if you show all the labels in your label cloud or list on your sidebar it can end up being very cluttered.  You will see above a screenshot of my label cloud on the main blog - in fact my labels add up to about 5 times this many.

I chose to have an alphabetical label cloud - because I think it makes it easier for people to find what they are looking for.  But it is, of course, a matter of personal choice.

Luckily you can restrict the numbers of labels that show in your cloud or list - this will not in any way affect the other label's effectiveness for search engines etc.

To do this, you go to your Dashboard.  Click Layout and then click edit on your Labels gadget.

You will see under Show the option to show all or select which ones to show.  If you select then you can go through and just tick the main ones - but don't leave it there - move down and  click the orange Save button or all your work will be wasted.  It took me 3 goes to realise this.

And you can go back and revisit this whenever you want.

Friday 24 August 2012

The Importance of Photos


All experienced bloggers know this.... but for the newbies out there.  Remember to have a photo for each and every post you do.  And put it right up the top of the post.

If you don't have photos of your own, google one - but be careful - if you are a blog with commercial content - like ads or you are trying to sell something - then you must only publish photos that are for common use or that you have permission to use.  There are a lot of common use photos out there.

If you get a photo off Google Images, remember to save it to your hard drive before posting it.  If you don't, you will find it disappears from your blog after a while.

If you are using your own photos, try to get them as good quality as you can.... here I am in the glasshouse throwing stones since my photos leave a lot to be desired still - particularly when I am snapping food at night - artificial light does you no real favours.

Do try and put captions on as many of your photos as you can - apparently it helps search engines find you, too.

Good luck with your images.

Thursday 23 August 2012

How I created a recipe thumbnail page the easy way using Pinterest


This blog is just a place I am collecting some of the things I have learned to do along the way.  I am not an expert but have learned by trial and error and hope this will help others along their blogging journey.

This post is about the easy way I created a page showing thumbnails for all my recipes.  There are no doubt other, better, ways to do this - but this is how I did it. ( To see what it looks like go to my main blog Carole's Chatter and look at the tabs at the top - this is the link)

You will need to be registered with Pinterest.  It is free.  Then you will need to create a new board and give it an appropriate title.  I called mine Carole's Chatter Recipes. (If you want people to be able to Pin your posts, don't forget they have to have at least one reasonable sized image before they can be pinned at all)

You will then need to have a way to pin the recipes on your blog to the Pin board.  I put a pin button onto a sidebar.   You need to go to your Dashboard and then to Layout and add a gadget - the one you want is Configure HTML/Jave Script.


This was the code I used:

<a href='javascript:void((function()%7Bvar%20e=document.createElement(&apos;script&apos;);e.setAttribute(&apos;type&apos;,&apos;text/javascript&apos;);e.setAttribute(&apos;charset&apos;,&apos;UTF-8&apos;);e.setAttribute(&apos;src&apos;,&apos;http://assets.pinterest.com/js/pinmarklet.js?r=&apos;+Math.random()*99999999);document.body.appendChild(e)%7D)());'><img alt='Pin It' onclick='doPinIt();' src='http://i493.photobucket.com/albums/rr300/blogsbyheather/PinIt.png' style='margin: 0 0 0 0;'/></a>

Once you have got your pin button, then all you do is pin each of your recipes to the Pin board you have created.  But a warning - I didn't realise until later that you can't change the thumbnails around on your board later - they will appear with the first pins at the bottom and the later ones at the top.  So give some thought to the order in which you will pin your recipes.  If you want to change it later you would have to do a whole new board.

Now you are almost done.  All you need to do is to create a tab up the top or a sidebar for the place where people click to find your recipe thumbnails.  I have actually found it very useful myself when choosing recipes to link in to blog hops etc.

Once you have your tab or sidebar you just link it to the url for your Pinboard.

Don't forget to pin all your new recipes as they are posted so you keep it up to date.

Hope this is helpful

PS  I have now started creating Pinterest pages for my other top tabs.  Have done Art and Books at this stage.  I may even, over time, do boards for each Food on Friday!